Scheduling a Report to Run at a Specific Date and Time
A report gathers information based on a specified set of criteria, and organizes and presents the information in an easy-to-read, printable format. There are many reports that you can access throughout the application. The reports typically provide information relative to the context of the page you are on. For example, the Customer page includes reports for the top 10 customers and the sales statistics, and more.
You can find reports in the Reports tab on selected pages, or you can use search to find reports by name. When you open a report, you are presented with a page that let’s you specify information (options and filters) that determines want to include in the report. For example, depending on the report, you can specify a date range, a specific record such as a customer, or sorting order.
Previewing a report
Choose Preview to see the report in the Internet browser. Point to an area of the report to show the menu bar.
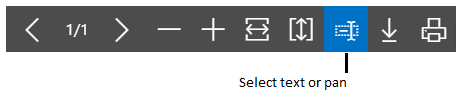
Use the menu bar to:
- Move through pages
- Zoom in and out
- Resize to fit the window
- Select text
You can copy text from a report, and then paste it somewhere else, like a page in Dynamics NAV or Microsoft Word. Using a mouse, for example, you press and hold where you want to start, and then move the mouse to select one or more words, sentences, or paragraphs. You can then press the right mouse button and select Copy. You can the paste the selected text wherever you want it.
- Pan the document
You can move the visible area of the report in any direction so you can view other areas or the report. This is helpful when you have zoomed in to see details. Using your mouse, for example, press and hold the mouse button anywhere in the report preview, and then move your mouse.
- Download to a PDF file on your computer or network.
Saving a Report
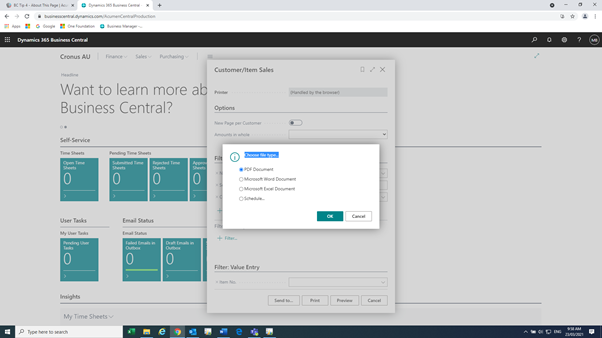
You can save a report to a PDF document, Microsoft Word document, or Microsoft Excel document by choosing Send to, and then making your selection.
Scheduling a Report to Run
You can schedule a report to run at a specific date and time. Scheduled reports are entered in the job queue and processed at the scheduled time, similar to other jobs. You can choose to save the processed report to a file, such as an Excel, Word, or PDF, print it to a selected printer, or process the report only. If you choose to save the report to a file, then the processed report is sent to the Report Inbox area on your Home page, where you can view it.
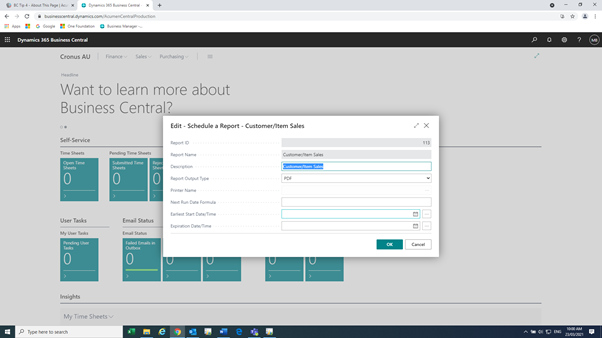
You can schedule a report when you open a report. You choose the Schedule action and then you enter information such as printer, and time and date. The report is then added to the job queue and will be run at the specified time. When the report is processed, the item will be removed from the job queue. If you saved the processed report to a file, it will be available in the Report Inbox area.
Printing a Report
When you want to print a report you have to download the report as a PDF, Word, or Excel document first by choosing Send to. Now, you can either open the report document right-away and print it or save it and print it later.
Using Saved Settings
A report can include one or more entries in the Saved Settings box. Saved settings are basically a predefined group of options and filters that you can apply to the report before previewing or sending the report to a file. Using saved settings is a fast and reliable way to consistently generate reports that contain the correct data.
The saved settings entry called Last used options and filters is always available. This entry sets the report to use options and filters that were used the last time you looked at the report.
NOTE
As an administrator, you can create and manage the saved settings for reports for all users.
At Acumen Consulting, we know Microsoft Dynamics 365 Business Central from back to front – so if you feel like it could be delivering you more, there’s no better partner to show you how.
We’re Acumen, where consulting truly means something.