Acumen’s senior developer for Dynamics NAV/365BC – Jurica Bogunovic, recently encountered some obstacles when versioning per tenant extensions using github releases. If you’ve come up against similar challenges, read on to see how Jurica recommends you proceed.
I was reminded (via comments on this issue) there is still some confusion about limitations and process of deploying per-tenant extensions to more than one tenant.
Dmitry Katson wrote about this issue back in January, as part of his tips and tricks post, but I would like to share how I have approached this from the process point of view. For this purpose, I have created a simple demo app, which you can find on my GitHub.
Much of the following will be quite obvious if you are experienced with GitHub, but if you are coming from Dynamics NAV world like I did, I hope it will be of some interest.
Problem
If we deploy a per-tenant app (e.g. extension built in 50000-99999 object range) to PROD tenant, then we can’t deploy the app with same name and version to any other tenants in the same region, unless Package ID (which is a GUID value) is exactly the same.
Every compile of app from VS Code will create new Package ID – this will happen when using F5 to deploy from VS Code, or building using CTRL+SHIFT+F5.
Not being able to see this Package ID from BC, and as it was too easy to overwrite the APP file recompiling, developers would have often incremented app versions to deal with this.
With Spring release, we can now use Inspect Functionality (CTRL+ALT+F1) on Extensions page to see Package ID, but it is still too easy to overwrite the app file.
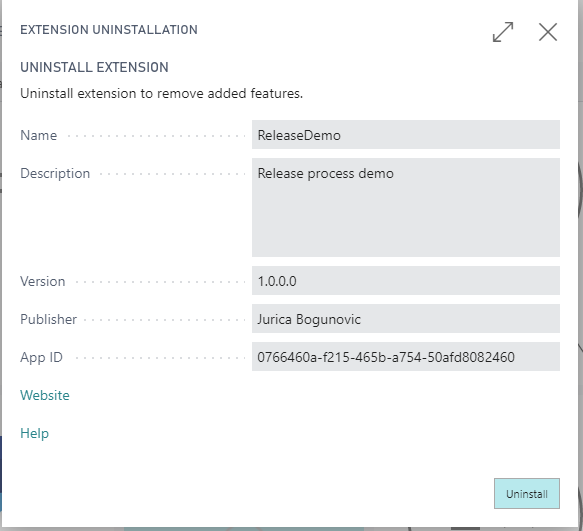
Package IDs not visible from BC
We can use Get-NAVAppInfo with -Path switch to read Package ID of the initial compiled app:
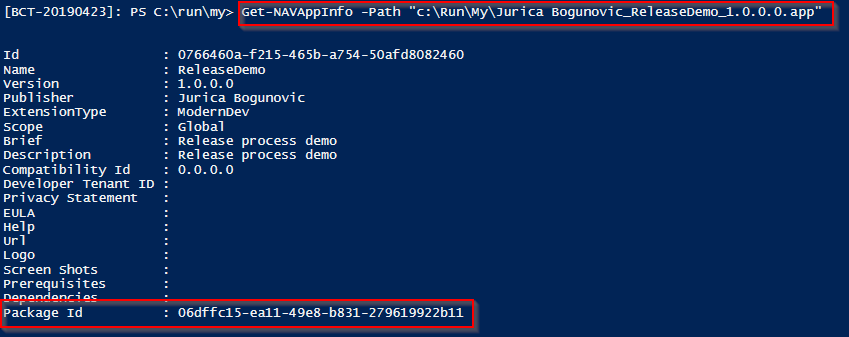
Retrieving Package ID from App file
After using CTRL+SHIFT+B to recompile the app:
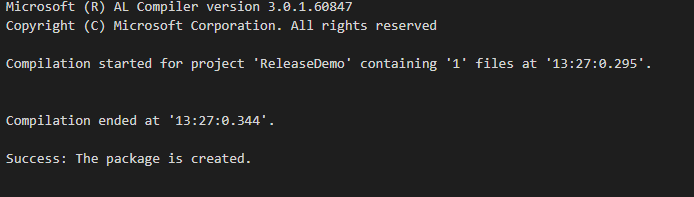
Building app using CTRL+SHIFT+B
Get-NAVAppInfo is now showing different PackageID:
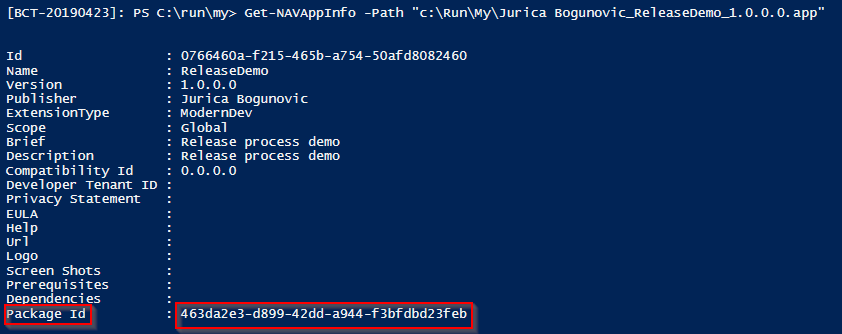
Build generates new Package ID
Unless we are very careful, and always commit and push the changes after each compile, we have now lost the version of file we had deployed on client’s tenant.
This is, of course, not much of an issue if we only develop our per-tenant app for a single tenant, but if we intend to install the same solution to multiple tenants in the region, we will have to increase version for each one.
Or will we?
Solution
We can use Release functionality on GitHub to keep track of our releases, and source code. This allows us to add ZIP file which contains APP file to GitHub, creates a Release, and associates it with current state of source code at the time of release.
Here is the Repository after initialization and 1st commit:
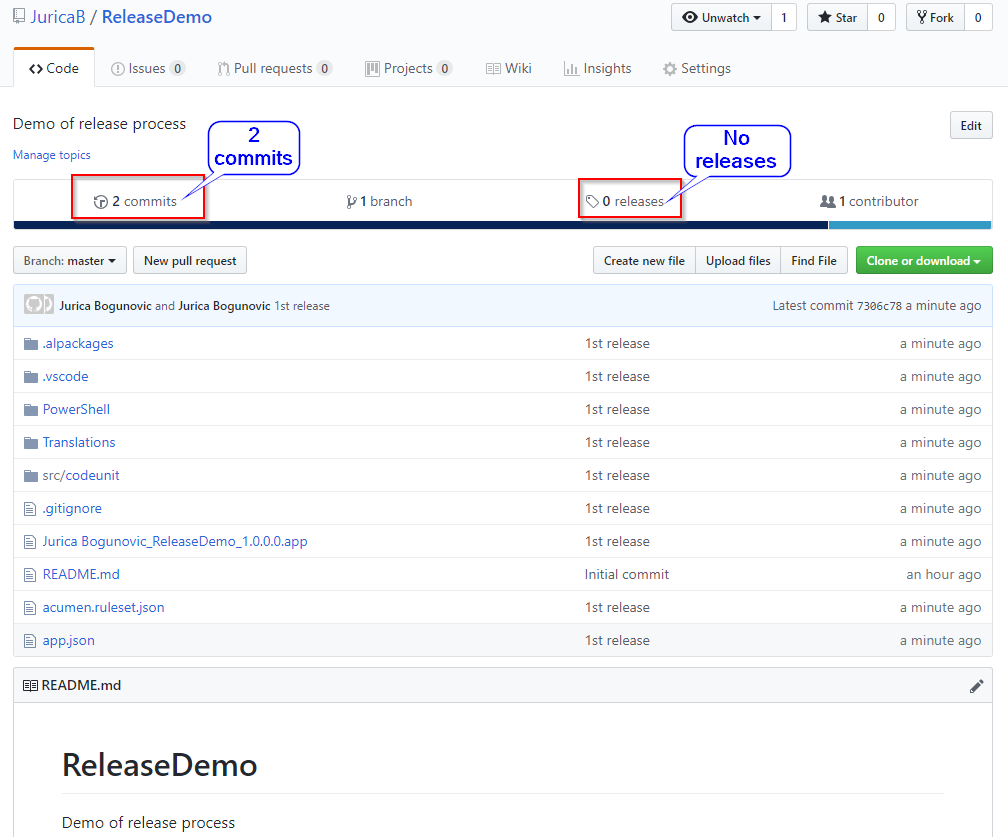
Repository
On the main page of repository, I will click on Releases. Because this is the first time I do this in this repository, I will click Create New Release.
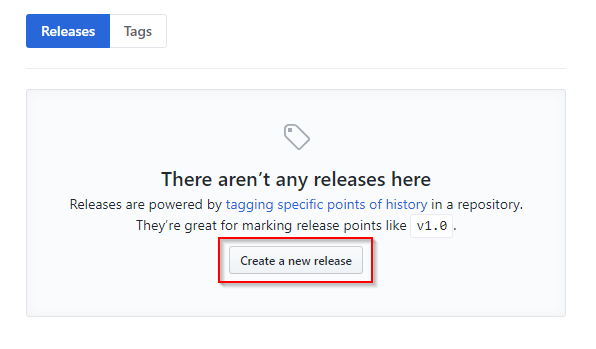
Releases – first time
In the page that opens, we will fill in the details as highlighted below, attach zipped APP file, then click “Publish release”. Note that APP file must be zipped, as GitHub does not recognize the .APP format.
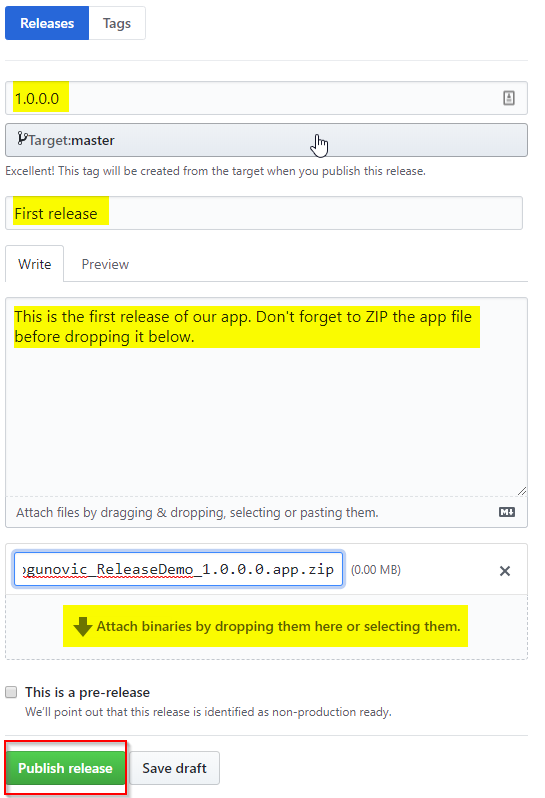
Creating new release
After clicking Publish Release, following page will open. Few points of interest:
- Here we can see Commit ID. Clicking here will take us to Commits page, and we can see that Release is now linked to our last commit “1st release”.
- We can always see when we are looking at latest release
- Release always has Source Code (zipped and tar/gzipped) from the related commit attached
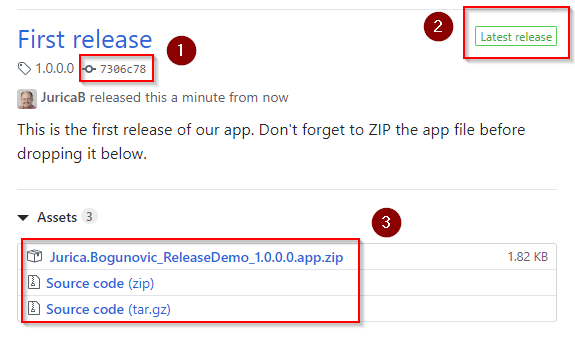
Release created
Remember to delete ZIP file from our project folder – as we have uploaded it to GitHub, there is no reason to keep it in the project too.
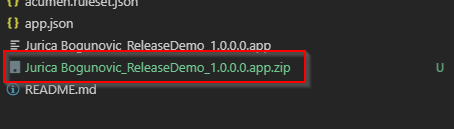
Remove ZIP file
Final step is to communicate to other developers, consultants (and possibly clients) link to latest release, to use when deploying to PROD, or for testing in local Docker.
What next?
As we continue working on our app, we will now always be able to retrieve this specific release to deploy to client’s tenants.
Once changes in app are ready for PROD deployment, we will:
- Build and do final test on our app
- Increase version in app.json and turn off ShowMyCode
- Create final APP file
- Commit and push all of the changes to GitHub
- Zip the final APP file
- Create new release, and attach zipped file
I hope you find this article useful, and that it saves you at least some of the headaches I had faced dealing with per-tenant extensions.
Jurica Bogunovic, Fun with C/Side – May 3, 2019
Jurica Bogunovic is part of Acumen’s team of expert programmers and regularly generates helpful content for our customers.
Jurica’s content is showcased on his blog “Fun with C/SIDE – Fun and games with C/SIDE and MS Dynamics NAV” Click here to see more useful content, tips and advice: https://funwithcside.wordpress.com